Why Ductless Mini-Split Installation is Gaining Popularity
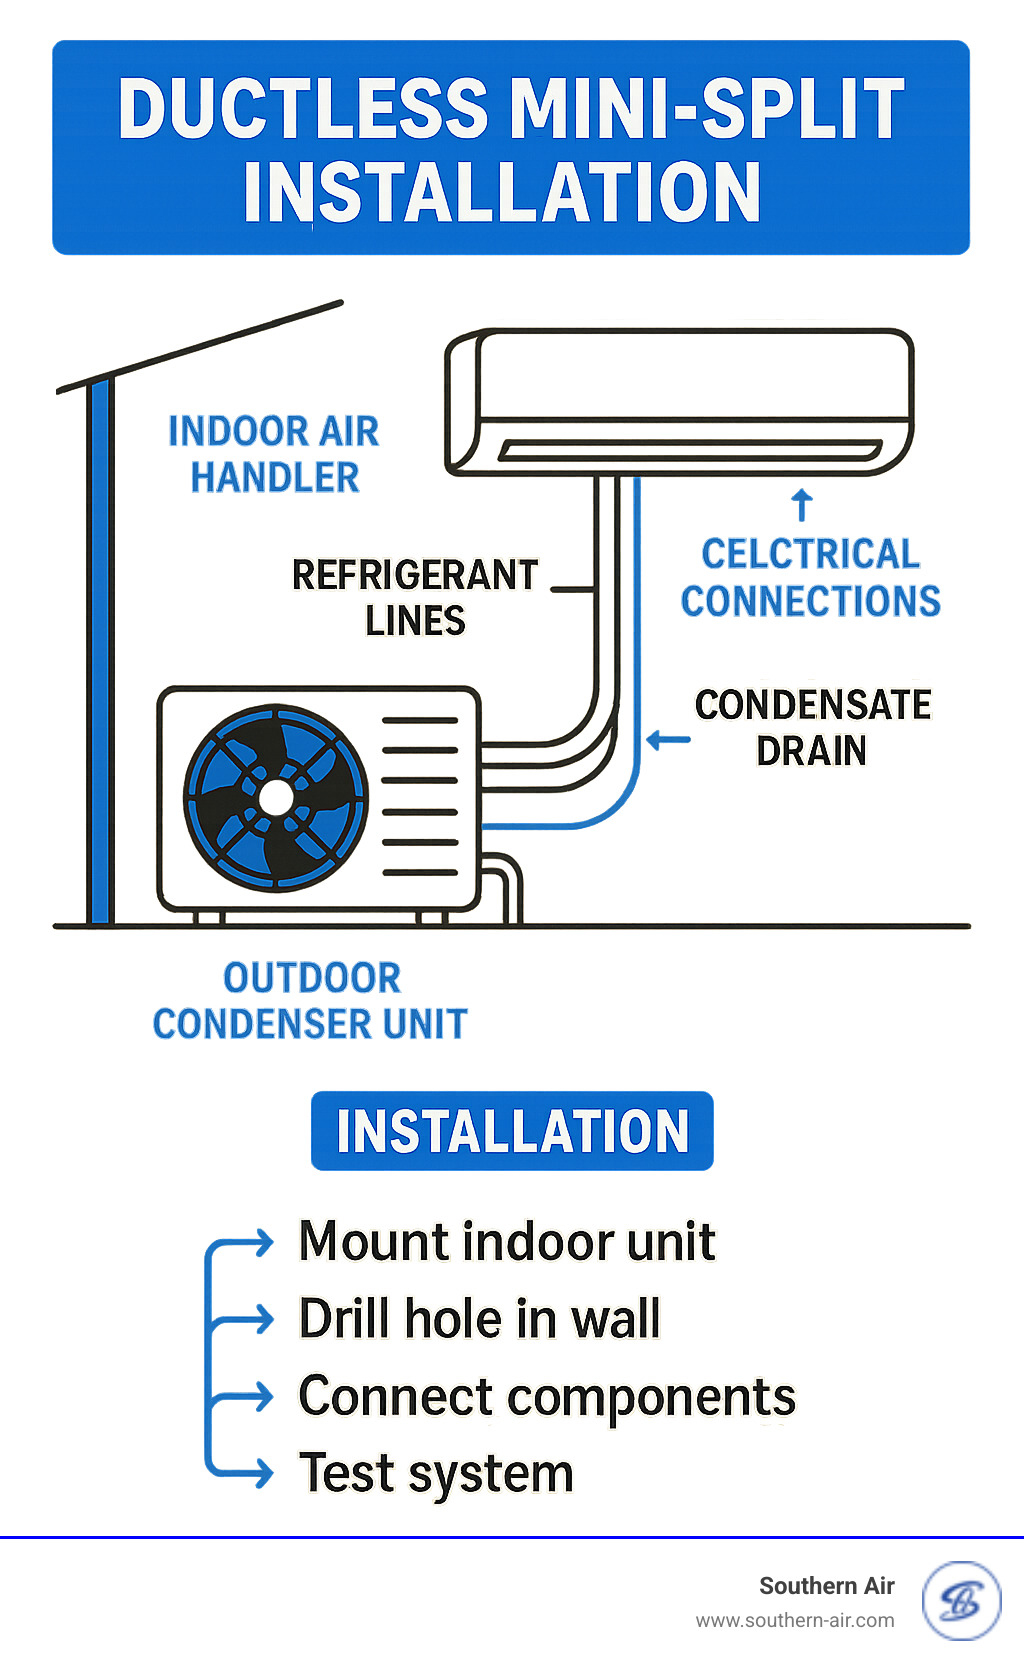
Ductless mini-split installation is a popular HVAC upgrade for efficient, flexible cooling and heating. Unlike central air, these systems connect an outdoor condenser to indoor air handlers via small refrigerant lines through a simple wall opening.
Key steps for ductless mini-split installation:
- Choose the right system - Single-zone, dual-zone, or multi-zone based on your needs
- Install the indoor unit - Mount bracket, drill wall hole, connect refrigerant lines
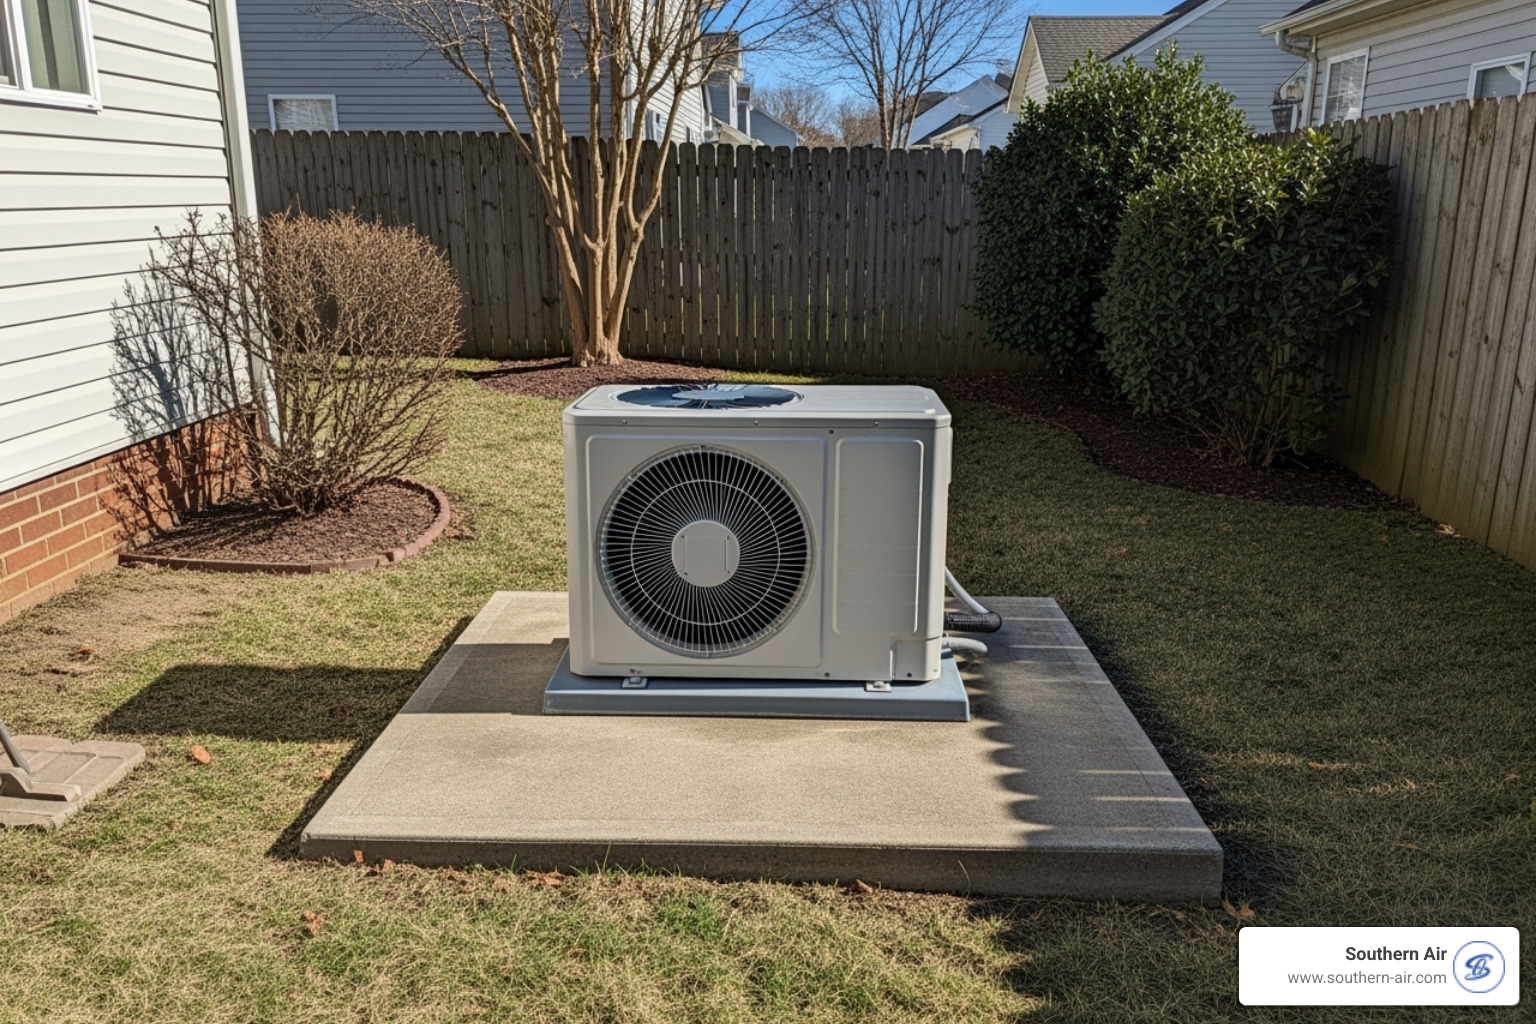
- Install the outdoor unit - Place on level surface with proper clearance
- Connect the system - Flare copper tubing, connect electrical wiring, test for leaks
- Professional considerations - Refrigerant handling requires EPA certification
The appeal is clear: no ductwork modifications, zone-by-zone temperature control, and significantly higher energy efficiency than traditional systems. Installed costs typically range from $2,000 to $10,500 or more, depending on system size and complexity.
Installation complexity varies. While DIY kits with pre-charged lines make single-zone installations accessible, most manufacturers require professional installation to maintain warranty coverage. Most system failures stem from installation errors, especially with electrical and refrigerant handling.
Whether you tackle this as a weekend project or hire professionals depends on your experience, local codes, and comfort with electrical and refrigerant systems.

Understanding Mini-Split Systems and Costs
A ductless mini-split system delivers comfort directly where you need it. It has two main parts: an outdoor condenser unit and one or more indoor air handlers. A small conduit connects them through your wall, carrying refrigerant lines, electrical wiring, and a drain line.
These systems use clever heat pump technology. Instead of creating heat, the system moves it. In summer, it pulls heat from inside and moves it outside. In winter, it reverses the process, extracting heat from the outdoor air and bringing it indoors.
This zoned cooling approach allows you to set different temperatures in different rooms, such as a cool bedroom and a warmer living room.
The advantages over traditional HVAC are compelling. No ductwork needed is a major benefit for older homes or additions. This also avoids the energy losses from leaky ducts, which can waste up to 30% of your cooling and heating energy.
Energy efficiency is another major plus. Many mini-splits use inverter technology, allowing the compressor to adjust its speed to match the room's needs, running smoothly instead of constantly cycling on and off.
Flexible installation opens up possibilities for spaces like converted garages or bonus rooms where central air isn't feasible.
Here's how ductless mini-splits stack up against central air conditioning:
| Feature | Ductless Mini-Splits | Central Air Conditioning |
|---|---|---|
| Cost | Often lower for additions or homes without ducts | Higher if ducts needed, lower if existing |
| Efficiency | Very high (no duct loss, inverter technology) | High, but reduced by duct losses |
| Comfort | Zoned control, precise temperature per room | Uniform temperature, less room-by-room control |
| Installation | Flexible, small wall opening required | Requires extensive ductwork |
| Aesthetics | Indoor units visible on walls or ceilings | Vents visible, main unit usually hidden |
| Noise | Very quiet indoor units | Quiet operation through vents |
Several factors influence ductless mini-split installation costs. Unit size (BTUs), the number of zones, brand and features, and installation complexity all affect the final price.
Sizing and Efficiency
Proper sizing is crucial for comfort and efficiency. A system that's too small will run constantly without cooling properly, while one that's too large will short cycle, wasting energy and creating temperature swings.
Mini-splits use three key efficiency ratings: SEER2 (seasonal cooling efficiency), EER2 (peak cooling efficiency), and HSPF2 (heating efficiency). Higher numbers mean lower electric bills. While high-efficiency units cost more upfront, they deliver significant long-term savings.
Proper sizing considers square footage, climate, insulation, windows, and heat sources. Professionals follow guidelines from organizations like the Air Conditioning Contractors of America as a guide. Learn more about savings in our article on Energy Saving Benefits of Ductless Mini-Splits.
Types of Ductless Systems
Single-zone systems connect one outdoor unit to one indoor unit, perfect for a specific area like a home office.
Dual-zone systems handle two separate areas with independent temperature control from a single outdoor unit.
Multi-zone systems are a whole-home solution, connecting one outdoor unit to several indoor units, each with its own temperature setting.
Indoor units come in several styles. Wall-mounted units are most common. Floor consoles are great for rooms with limited wall space. Ceiling cassettes mount flush into drop ceilings for a discreet look.
Explore more options on our Ductless Mini-Split AC Systems page.
Typical Costs and Potential Savings

The investment in a ductless mini-split installation includes the unit, installation labor, and materials. Several opportunities can reduce your overall cost.
Federal tax credits through programs like the Inflation Reduction Act reward energy-efficient home improvements.
Utility incentives from your local energy provider often include rebates for high-efficiency systems.
Manufacturer rebates offer seasonal discounts or cash back on qualifying systems.
These combined incentives can significantly offset your initial investment, making a high-efficiency ductless system a smart financial choice.
The Great Debate: DIY vs. Professional Installation
The appeal of a DIY ductless mini-split installation is saving money on a home improvement project. It's more feasible today thanks to pre-charged line sets and DIY-friendly kits that simplify the process.
These kits come with pre-charged and sealed refrigerant lines, eliminating the most technical part of the installation. You connect the lines, mount the units, and hook up the electrical.
However, even with these kits, a ductless mini-split installation has serious risks that can lead to expensive problems.
Electrical hazards are a top concern. Most mini-splits need dedicated 240-volt circuits. A wrong connection could cause electrical shock, fires, or damage to your electrical panel.
Refrigerant leaks can occur if connections aren't perfectly sealed. Refrigerant is expensive, an environmental hazard, and can cause chemical burns. Handling refrigerant in traditional systems legally requires EPA 608 certification.
Improper installation, such as an unlevel indoor unit, can cause water damage. Poor outdoor unit placement can restrict airflow and reduce efficiency. These issues can increase your energy bills for years.
Most importantly, many manufacturers will void your warranty without professional installation, as most system failures are traced to installation errors. That warranty could save you thousands on future repairs.
For more on what professional installation involves, see our guide on Ductless AC Installation in Charlottesville, VA.
When to Hire a Professional
Some situations demand professional expertise for your ductless mini-split installation.
Complex multi-zone systems involve running multiple line sets and have more complex electrical needs, leaving little room for error.
If you have a lack of electrical experience, call a professional. Running new 240-volt circuits and ensuring everything meets local codes is not a job for beginners.
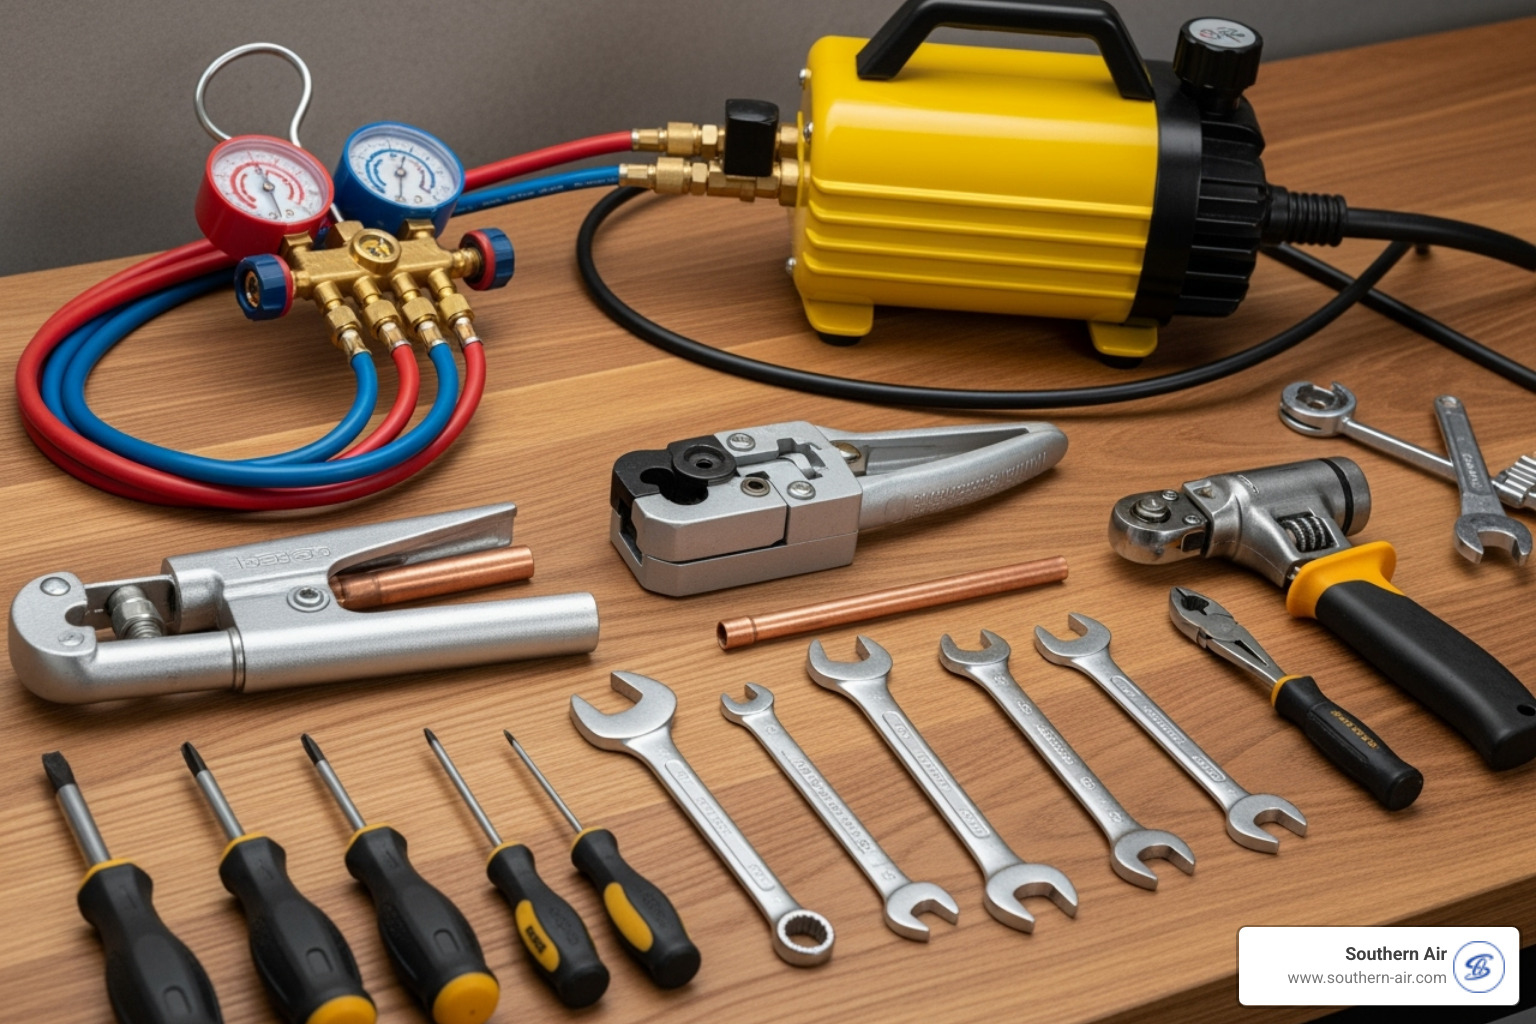
Handling refrigerant in traditional systems requires specialized tools like vacuum pumps and gauges, along with EPA certification.
Local code compliance is another area where professionals excel. They stay current with building codes, handle permits, and ensure the installation passes any required inspections.
Hiring a professional provides peace of mind, backed by experience, proper tools, insurance, and the confidence the job is done right. It also protects your warranty coverage, which alone often justifies the cost.
For comprehensive services, explore our Ductless Mini-Split HVAC in Charlottesville, VA options.
Benefits of Professional Installation
Choosing professional installation for your ductless mini-split system offers several key benefits.
Guaranteed workmanship from reputable companies covers any installation errors. If we make a mistake, we fix it at no charge.
System optimization ensures your unit is correctly sized, positioned for optimal airflow, and fine-tuned for maximum efficiency, including precise refrigerant handling.
Safety compliance protects your family and property. Professionals follow electrical codes and safety protocols to minimize risks of fire, shock, or environmental damage.
Warranty protection keeps your manufacturer's warranty intact, protecting your investment against product defects.
Faster completion means less disruption. Experienced installers can often complete a job in a day that might take a DIYer a full weekend.
Professionals also have access to a broader selection of equipment beyond standard DIY kits, including high-efficiency models and specialized indoor units.
Finally, professionals have the problem-solving experience to handle unexpected challenges, from structural issues to electrical complications.
For inspiration, read about Space-Saving Ductless AC Installation options.
Your Step-by-Step Ductless Mini-Split Installation Guide
If you're tackling a ductless mini-split installation with a DIY-friendly kit and feel confident in your skills, this guide can help. This is a two-person job for safety and ease.
Safety comes first. Always turn off power at the breaker before any electrical work. Wear safety glasses and gloves. Most importantly, read your unit's manual thoroughly and follow all specific requirements for torque settings, clearances, and connections.

Step 1: Preparation and Tools
Proper preparation is key. Plan the locations for your indoor and outdoor units, considering airflow, electrical access, and the path for the refrigerant lines.
For tools and materials, you'll need a stud finder, drill, level, tape measure, and a hole saw (typically 2-3 inches). For traditional systems, you'll also need a torque wrench, vacuum pump, manifold gauges, a flaring tool, a deburring tool, and a tubing cutter.
Gather your materials: exterior-grade sealant, correctly sized electrical wiring, a quick disconnect switch, mounting hardware, line set covers, and condensate drain tubing. For refrigerant connections, use Nylog or compatible oil and a quality bubble leak detector.
Step 2: Installing the Indoor Unit
Proper indoor unit placement is critical. Choose a location with good airflow, away from heat sources or direct sunlight. Mounting on an exterior wall simplifies running the lines. Installing on an interior wall is more complex, as lines must run through attics or crawlspaces, and you may need a condensate pump. For more guidance, see our insights on Ductless AC in Winchester, VA.
Ensure the wall is strong enough to support the unit (40-50 pounds). Mount the bracket directly to wall studs or use heavy-duty anchors.
When mounting the bracket, it must be perfectly level to ensure proper drainage and prevent water damage.
Drill a 2-3 inch hole through the wall, angling it slightly downward to the outside for drainage. Before drilling, check for hidden wires or pipes.
Run the lines (refrigerant pipes, control wires, drain tube) through the hole. Have a helper guide the lines from outside. Ensure the condensate line is at the bottom of the bundle for gravity drainage.
Step 3: Installing the Outdoor Unit
Your outdoor condenser needs a solid foundation and proper placement for efficient operation.

Choose a location on a solid, level surface like a concrete pad or sturdy wall bracket. The unit must have adequate clearance for airflow as specified in the manual to prevent overheating.
In snowy climates, mount the unit high enough to stay clear of snow buildup. A shaded location can sometimes improve efficiency.
Use vibration pads under the unit to minimize noise transfer.
Install an electrical disconnect box near the outdoor unit. This is required by code for safety during maintenance.
Step 4: Connecting the System
Precision is critical when connecting the system components.
Refrigerant lines carry refrigerant between the units. For traditional systems, you must flare the copper tubing to create leak-proof seals. Make clean cuts, deburr the edges, and use a flaring tool. When connecting flare nuts, apply a small amount of Nylog or refrigerant oil, hand-tighten, then use a torque wrench to meet the manufacturer's specifications. Overtightening can damage the flare, while undertightening causes leaks.
Connect the condensate drain with a continuous downward slope to allow for gravity drainage. If this isn't possible, install a condensate pump.
Electrical wiring connections require a dedicated circuit (120V or 240V, per your unit's specs). Most systems are hard-wired and require a disconnect switch. If you are not an experienced electrician, hire a professional for this step.
For traditional systems, leak testing is mandatory. Pressurize the lines with nitrogen and use a bubble leak detector on all joints to find and fix any leaks.
Finally, vacuuming the lines removes air and moisture from non-pre-charged systems. Use a vacuum pump and gauges to pull a deep vacuum (500 microns or lower) and perform a standing vacuum test to confirm there are no leaks. Only then should you release refrigerant into the system.
Post-Installation Care and Maintenance
With your ductless mini-split installation complete, regular maintenance will keep it running efficiently for years. Most tasks are simple and quick.
Monthly filter cleaning is the most important habit. Clogged filters in your indoor units reduce airflow and increase energy use. Simply slide the filters out, rinse them with warm soapy water, let them dry completely, and slide them back in. Check them more frequently if you have pets or allergies.
Keep your units clean by wiping down the indoor units with a soft, damp cloth to prevent dust buildup.
Your outdoor unit needs breathing room. Regularly clear away leaves, grass clippings, snow, or other debris that could block airflow. Ensure plants are trimmed back and the unit has the clearance specified in your manual.
While you can handle these basics, professional tune-ups are essential. Schedule annual maintenance with a qualified HVAC technician to clean internal coils, check refrigerant levels, inspect electrical connections, and catch potential issues early. This proactive approach maintains efficiency, extends your system's lifespan, and keeps your warranty valid.
If you notice strange noises, weak airflow, or ice buildup, address it quickly to prevent minor issues from becoming major problems. For expert help, our team can assist with Ductless Repair in Lynchburg, VA.
Frequently Asked Questions about Ductless Mini-Split Installation
Here are answers to common questions we receive about ductless mini-split installation.
What are the main disadvantages of a ductless mini-split?
While ductless systems are excellent, they have some limitations to consider.
The upfront cost is higher than a window unit, though often less than a new central system with ductwork. Long-term energy savings frequently offset this initial investment.
The aesthetics of indoor units is a consideration for some. Unlike hidden central air vents, the indoor units are visible on your wall or ceiling, though modern designs are increasingly sleek.
Regular filter cleaning is required more often than with central systems, as each indoor unit has its own filter. This is a simple monthly task.
Mini-splits may not be ideal for very large, open-plan homes. While multi-zone systems can cover an entire home, achieving uniform temperature in a massive open space might require multiple indoor units.
Can I install a mini-split on an interior wall?
Yes, installing a mini-split on an interior wall is possible, but it adds complexity to the ductless mini-split installation.
The main challenge is running the line set and drain line through an attic, crawlspace, or wall cavity to reach the outdoor unit. This is more involved than a standard exterior wall installation.
For drainage, you will likely need a condensate pump to move water to a suitable drain, adding another component to the system. For insights, see our Ductless Heating in Winchester, VA page.
What are the electrical requirements for a mini-split?
This part of a ductless mini-split installation is critical and best left to professionals.
Every mini-split needs a dedicated circuit with its own breaker, as required by electrical code to prevent overloading.
Voltage requirements vary by unit size, with smaller units often using 120V and larger or multi-zone systems needing 240V. Your unit's manual will specify the exact power and amperage needed.
You must also install an outdoor disconnect box near the condenser for safety during maintenance.
Hiring a licensed electrician is strongly recommended for this work. Improper electrical work is dangerous and can lead to fire or equipment damage. Professional installation ensures safety and peace of mind.
Conclusion
Starting on a ductless mini-split installation—whether as a DIY project or with professional help—is a major step toward enhancing your home's comfort and efficiency. These systems provide precise zoned comfort, significant energy savings, and best installation flexibility for any space.
Ductless technology is adaptable, perfect for a single room, a new addition, or an entire home. It's an investment in a smarter, more responsive climate control solution.
Whether you choose DIY or professional installation, the right choice depends on your skills and the project's complexity. A successful DIY project is rewarding, but professional installation provides peace of mind, guaranteed workmanship, and warranty protection.
A ductless system is a smart upgrade for your home, offering dividends in comfort and efficiency for years. It represents a shift away from a one-size-fits-all approach to a more intelligent way of living.
At Southern Air, we've served the Lynchburg community since 1946, and we are committed to helping homeowners make informed decisions about their comfort systems.
For expert advice and professional installation in the Lynchburg area, trust the experienced team at Southern Air. We can guide you through system selection, installation, and maintenance. Find trusted AC contractors in Lynchburg, VA and let us help you achieve the home comfort you deserve.
